Gluten-Free Cooking For One

Celiac And The Single Girl, Or: How To Make Food That Does Not Suck For One Person {Although I Suppose You Could Feed Other People, Too}


3 Comments

What’s In The Crockpot Tonight, Birthday Edition: Pulled Barbecue Beef

It’s my birthday today!!! (party horns)

And I completely forgot about it in the weeks leading up, so I also didn’t think of scheduling a big shindig. lol Small and comfortable is more to my taste right now, anyway, so I have a friend coming over for dinner and a movie. 😀 Hooray!

I had a dream last night that I had ribs for my birthday, but she’s allergic to pork, and there was chuck on sale; so instead of ribs, we’re having pulled barbecue beef. I’m making gluten-free soft dinner rolls from the “GF Artisan Bread In Five Minutes A Day” brioche recipe, and I picked up some strawberries, because they were on sale, for dessert. My friend is bringing salad stuff, and basically it looks like a feast to me. I’m excited.

There is also a plan to go and pick up ice cream. So, even better.

Here’s the recipe I’m using for the barbecue beef — distinguished by its ease and (wait for it) the fact that I had most of the ingredients. I make no apologies for being a lazy cook.

http://www.kraftrecipes.com/recipes/slow-cooker-bbq-beef-145861.aspx

Mine will have a better-looking bun, salad on the side, and let’s not forget the ice cream for dessert!! Photo from the recipe page on Kraft’s website.

INGREDIENTS
2 Tbsp. brown sugar
2 Tbsp. cider vinegar
1 Tbsp. balsamic vinegar
1 tsp. dried minced onion (I didn’t have this)
1/2 tsp. ground black pepper
1/4 tsp. garlic powder
1 boneless beef chuck roast (2-1/2 lb.)
1 cup barbecue sauce (Kraft’s recipe calls for a particular kind, but it wasn’t explicitly gluten free, so I picked up Bone Suckin’ Sauce instead)
7 sandwich buns, split

INSTRUCTIONS
MIX first 6 ingredients until blended. Place meat in slow cooker; top with sugar mixture. Cover with lid. Cook on LOW 7 to 9 hours (or on HIGH 5 to 7 hours).

TRANSFER meat to cutting board. Let stand 10 min. Meanwhile, use ladle to remove liquid from slow cooker; set aside.

PULL meat into shreds with 2 forks. Discard gristle. Return meat to slow cooker; stir in barbecue sauce. Gradually stir in reserved liquid if thinner consistency is desired. Increase heat to HIGH; cook, covered, 15 min. Serve in buns.

As I wasn’t satisfied with Kraft’s GF-ness, I picked up a jar of something that said it was gluten-free (and also contained no corn syrup, a win for me as well): Bone Suckin’ Sauce.

I’ve dipped a finger in the bottle and so far it tastes really good. Not too smoky, which is often a problem for me (it gives me headaches), sweet, tangy, nomnomnom. I’m looking forward to this!! Photos etc to come later!

Leave a comment

What’s In The Crock Pot Tonight: Pot Roast!

I looooooooove pot roast. Love. And I found a nice big piece of chuck on sale, so half of it is in the slow cooker and half of it is in the freezer. Yay! Dinner for later too. ❤

I'm using the recipe below, but cooking it in the crock pot instead of a Dutch oven. Back in the last century (!), my grandma gave me one of the fabulous pots that lets you fry things on the stovetop in the insert, then put that directly in to cook, so you don't lose any of the juices or numminess.

Recipe is here: http://www.foodnetwork.com/recipes/ree-drummond/perfect-pot-roast-recipe.html – Ree Drummond for the Food Network. I love her rice pudding recipe, so I thought I’d give the roast a whirl. It was incredibly easy to prepare, and it smells DELISH.

Of course, I added a couple things and changed a couple. Because I never have all the ingredients.

Ingredients
Salt and freshly ground black pepper
One 3 to 5-pound chuck roast (I had 1.5lb)
2 or 3 tablespoons olive oil
2 whole onions, peeled and halved (I had about half of one, oops)
6 to 8 whole carrots, unpeeled, cut into 2-inch pieces (I had these!! Woohoo!)
1 cup red wine, optional (I used about a Tbsp of rum because, you guessed it, I had it)
3 cups beef broth (didn’t add because I didn’t want soup)
2 or 3 sprigs fresh rosemary (dried)
2 or 3 sprigs fresh thyme (dried)

(I added some Worcestershire sauce after I got everything in the pot, patted garlic salt on the meat before I browned it, and crushed then minced and added 3 cloves of garlic. I also added a big dollop of my garlic sauce on top. We’ll see if that is officially Too Much Garlic. :} I didn’t realize I had added it in three different ways until I put the lid on and started thinking about what I’d done. I was cooking on auto-pilot. Oops)

Directions
Preheat the oven to 275 degrees F. (I got the crock pot ready)

Generously salt and pepper the chuck roast. (and garlic salt!)

Heat the olive oil in large pot or Dutch oven over medium-high heat. Add the halved onions to the pot, browning them on both sides. Remove the onions to a plate. (I added the minced garlic here)

Throw the carrots into the same very hot pot and toss them around a bit until slightly browned, about a minute or so. Reserve the carrots with the onions.

If needed, add a bit more olive oil to the very hot pot. Place the meat in the pot and sear it for about a minute on all sides until it is nice and brown all over. Remove the roast to a plate.

With the burner still on high, use either red wine or beef broth (about 1 cup – or, in my case, just enough rum) to deglaze the pot, scraping the bottom with a whisk. Place the roast back into the pot and add enough beef stock (I used water) to cover the meat halfway.

Add in the onions and the carrots, along with the fresh herbs.

Put the lid on, then roast for 3 hours for a 3-pound roast. For a 4 to 5-pound roast, plan on 4 hours. The roast is ready when it’s fall-apart tender. (I turned the crock on to low, put the lid on, and will turn it off when I get up tomorrow morning, first thing. I’ll post an update after that!)

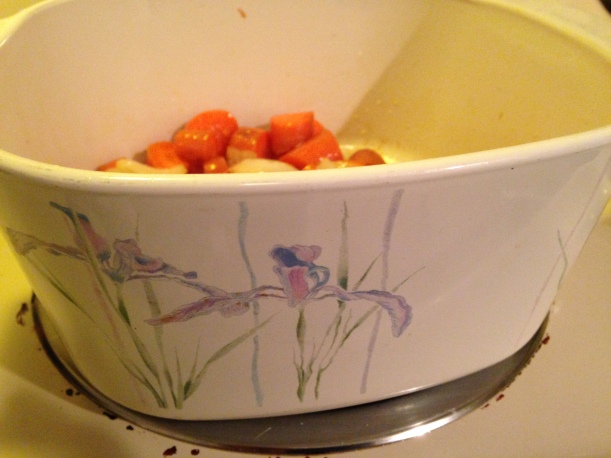
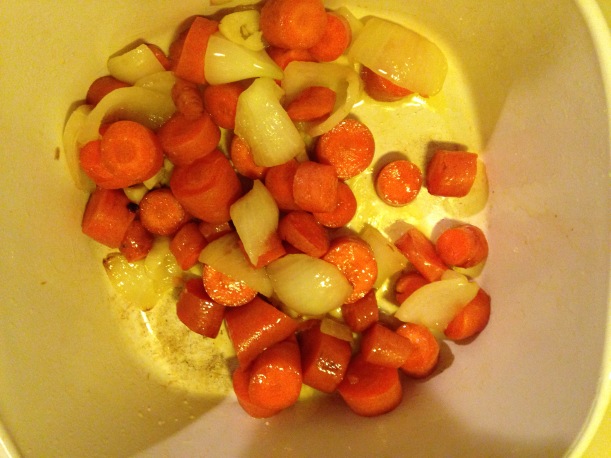
Onions and carrots, the "vintage" crock pot, and my adorable kitchen assistant, who is now very interested in the trash. Note to self: take out trash before trouble ensues.

Onions and carrots, the “vintage” crock pot, and my adorable kitchen assistant, who is now very interested in the trash. Note to self: take out trash before trouble ensues.

IMG_3829

IMG_3828

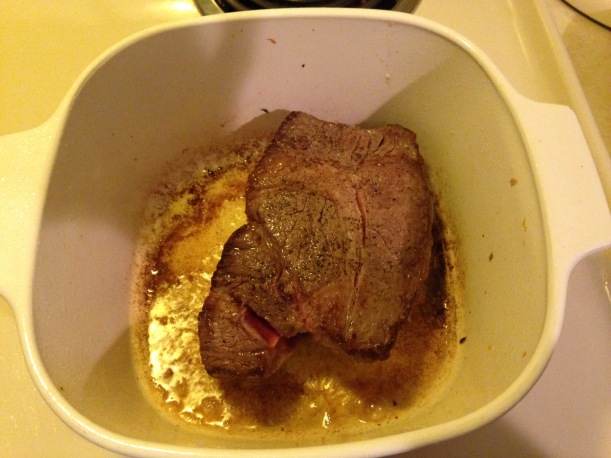
MEAT

MEAT

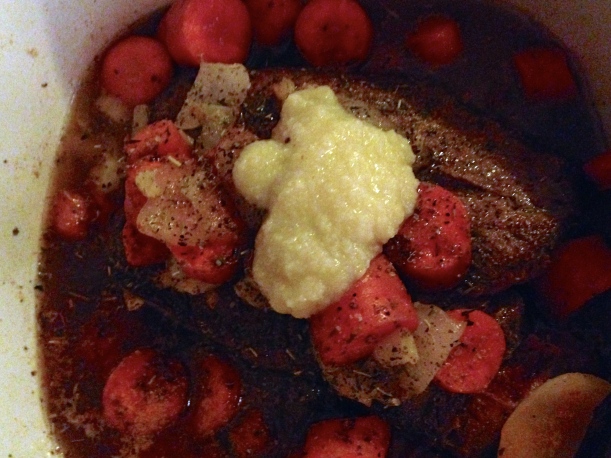
Ready for the lid! The big goop on the top is garlic sauce. MMMmmmmmm.

Ready for the lid! The big goop on the top is garlic sauce. MMMmmmmmm.


Leave a comment

What’s In The Crockpot: Shredded Beef – Update!!

I just ate a bowl of the shredded beef on quinoa, with colby jack cheese over top — it’s what I have ready to go, and I’m too hungry to be picky about the delivery vehicle — and it’s delicious!! 😀

Here’s the link from earlier today, and here’s my final recipe. As always, I had to make substitutions and some changes, both based on what I had in the kitchen and personal taste.

This recipe is from “Life in the Lofthouse” (link in the earlier post), although I found several similar; this one didn’t require tomato sauce or paste, and tomatoes are out for me (migraine trigger), so it was the winner.

INGREDIENTS
1 (2.5 lb) chuck roast — I used probably a lb of top round
1 (14 oz) can beef broth — I used water
1 1/2 Tablespoons chili powder — I only had cayenne
1/2 Tablespoon ground cumin
1/2 Tablespoon onion powder — I didn’t have, so I sliced up part of an onion and put that in the pot
1 teaspoon garlic powder
1 teaspoon salt
1/4 teaspoon pepper
Juice of 1 Lime — I only had bottled lemon juice. I know. I know. It’s a sin. It worked, though.
2 Tbsp salsa verde — I needed a little more tang and piquancy, so I added this

INSTRUCTIONS
1) Spray crock pot with cooking spray. Place roast inside crock pot. Pour the beef broth (water) over the roast and then add fresh lime juice (or bottled lemon juice).
2) In a small bowl, whisk together chili powder (cayenne), cumin, onion powder, garlic powder, salt and pepper. Sprinkle the roast with the spice mixture.
3) Cover with lid, and cook on Low heat 8 to 10 hours, or on High heat 5 to 6 hours. Remove roast from crock pot and transfer to a large platter. Shred meat and remove any fat. Add salsa verde.
4) Return shredded beef to crock pot. Cover with lid and cook an additional 30 minutes (I went another hour because I got involved in a task). Remove beef with tongs to drain juices before serving in tortillas (or on rice, or quinoa, or salad, or…). Serve with desired toppings.

I didn’t take a picture because it was a mess. Also, I had already eaten it by the time I thought about photos. :} Sorry. Photos to come!!


2 Comments

Report on the garlic sauce “on the plate”

I just made a steak and put this sauce over it as soon as it got out of the oven; served it over quinoa and lightly fried onions. I deglazed the onion pan with sherry, let the alcohol cook out, then poured that over top of everything. A little kosher salt and some cracked black pepper, and it was dinner.

Ohhhhhhhhhhhhhhhhhhh yeah. It was good.

No photos, because I have already eaten it. Sorry!! lol

What’s in the sauce? This, this, and some more of this. And 2 cheeses, and lots of olive oil. Mmmmmmmm.- I’ve also added this photo in the hope that when this posts on Facebook, it won’t have a headline about garlic sauce and a photo of cookie dough dip. Because ugh.

For dessert, I have a healthy cookie dough dip with white chocolate chips. I’ll post the recipe in the next day or two; this has been a journey of discovery. lol I’m on my second batch and it’s much better, but I’m having to do some substituting and that is always interesting.

Photo from the Glowing Fridge, the site with the recipe that was a better cross between health and deliciousness for my purposes. You can find their original recipe at the website listed on the photo.

Hope you’re having a fantastic day!


Leave a comment

More Beefy Stir-Fry Goodness

This post is actually a twofer!! Lunch and dinner, and both were beefy. 😀
This afternoon I got a 3 lb. rump roast on sale – half of it went in the freezer, and the rest I divided: about 4 or 5 oz went into the fridge for dinner, and the rest I ground up to make more food for the dog and some hamburgers for me.

LUNCH: Parmesan/Worcestershire Burgers and Rice
(It occurs to me as I type this that the dog and I are on a very similar diet. In his case, it’s because he’s just getting back to normal after a bout of tummy troubles, and in mine, it’s due to laziness. Already made a bunch of rice for the dog? Grinding beef for the dog? Sure, I’d love some burgers and rice, thanks. :D)

Anyway, I boiled the ground beef for Snaps, as before – had to do it in two batches as the pan isn’t very large and I had a good bit of beef – and then put that away for the next couple of days.

For me, I took enough beef to make a couple of small patties (I like my burgers more done than not, so the smaller and looser the patty, the better – within reason), then added garlic salt, ground black pepper, and Worcestershire sauce (a fair amount, it’s yummy). Mixed that all together with my fingers without smooshing the beef, then formed it into loose patties. Fried those in olive oil until done and nicely brown on both sides, then took out the burgers and tossed rice in the pan with the juices, so I could heat up the rice and infuse it with that beefy flavor. While the burgers were still hot, I put a little piece of butter on top of each to melt, because butter is divinity. Put the rice next to the burgers, then a little bit of my favorite garlic/olive oil/parmesan/romano sauce on top and stirred it in. Then, because life is short and I love parmesan cheese, I sprinkled a bit more shredded parmesan on top, added a bit of salt, and then devoured it. Soooo good.

DINNER: Vaguely Asian Beef Stir Fry… Thing
And when I say “vaguely”, I mean vaguely. My ex used to make amazing international meals, and I’ve been hankering for a bit of Korean or Thai. I didn’t have most of the ingredients, but I tried for something with a similar feeling, and it was delicious. I sliced the beef thin, then marinated it for a little while in rice vinegar while I sliced up part of a sweet onion two ways: a coarse chop, for in the pan, and some thin-sliced onions, for sprinkling raw over the top. (I like the difference in the taste and texture between uncooked, cold onions with a little bit of crunch versus soft, sweet, warm, fried onions.) Melted about a Tbsp of coconut oil in the pan, then fried the meat until it was cooked, adding a little garlic powder and LOTS of black pepper (one of my favorite Thai meals is basically just meat in lots of black pepper and a sauce). Took that out while leaving the oil and beef juices in the pan, then softened the coarse-chopped onion in the juices. Wanted a bit of rice with this as well, so I tossed in a little into the pan to heat up while the onions finished cooking. Why use the microwave when I already have a hot pan?

Put the meat over the rice and cooked onions, then put a few pieces of the chopped raw sweet onion on top to finish. Delicious!!

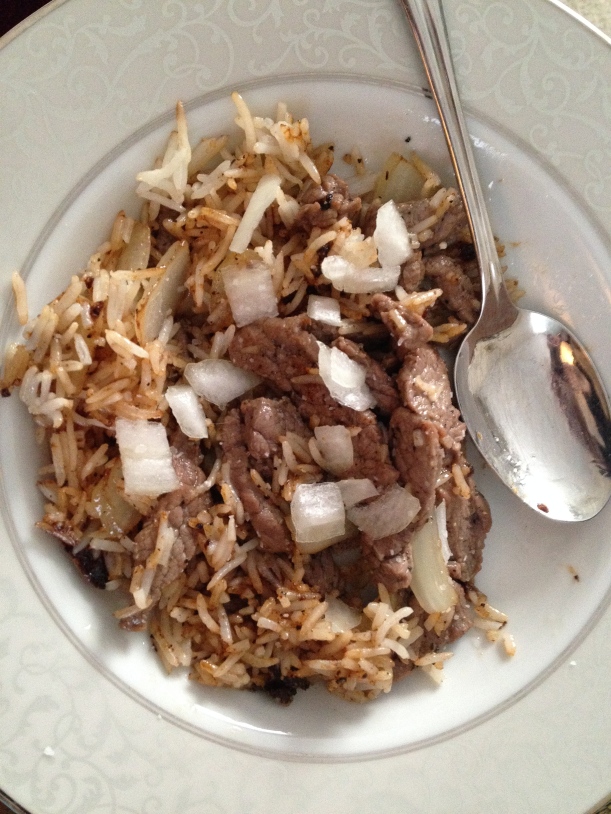
Vaguely Korean-Thai beef stir-fry thing.  :}

Vaguely Korean-Thai beef stir-fry thing. :}

Two single-portion, gluten and corn-free meals from the same chunk of beef, and there’s more beef in the freezer. And each meal was a one-pan, one-knife endeavor, so I didn’t have much to clean up. In fact, I washed the same pan from lunch and just put it on the stovetop to dry, because I knew I was going to use it for dinner. I love when eating is simple. 😀


5 Comments

Butter/Garlic/Sherry Steak Lunch: because I’m fancy

So yesterday I made a run to Costco and loaded up on paper goods and giant packages of necessities, and one of my purchases was a nice big package of top round steak. It was about the price of a good piece of beef at the grocery store, and I got 7 2-to-3 oz steaks out of it, plus a bunch of beef I ground up and boiled for the dog / made hamburgers out of. Score!!

I froze all the steaks but one, which I left out immediate use, and today lunchtime was the time. (jazz hands) It’s sunny and not cold enough to cause my lips to freeze right off my face, taxes are almost done, and I’m working on creative projects again. So, it’s celebration time.

I looked for a good way to cook this piece of meat, as always, and found this site:
http://www.steakeat.com/how-to-cook-round-steak-on-stove-top.html/3
There were several methods, but I really wanted something pan-seared, so I looked at the stove top method and liked it. So I heated up a pan and added about 1 Tbsp of oil and let that get nice and hot. Put in the steak and let it get a nice brown crust on the first side, then flipped it over. (I have a splatter screen and I use it religiously; I hate getting burned by spitting oil)

In the meantime, I got a Tbsp of butter and a clove of garlic ready to go in the pan for the last minute or so, as recommended by the website above. I crushed the garlic clove, then minced it down nice and small. Pulled out the steak and sliced that into strips to maximize the buttery/garlicky (how do you spell that?) surface area, then threw them all back in for a last finish.

After the steak came out, there was still lots of butter and garlic in the pan, and I hate wasting it. I threw in a bit of rice that was left over from yesterday and stir-fried it for a minute, then finished the whole thing off by pouring in a jot of sherry and cooking off the alcohol. Poured the rice etc. over the top of the steak, added a sprinkle of parmesan cheese, and voila!! Deliciousness!!

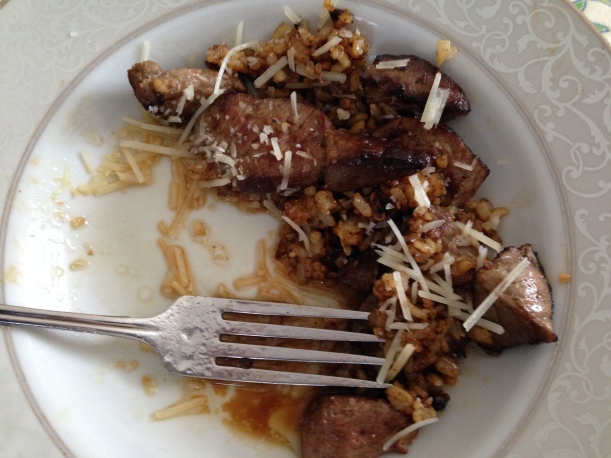
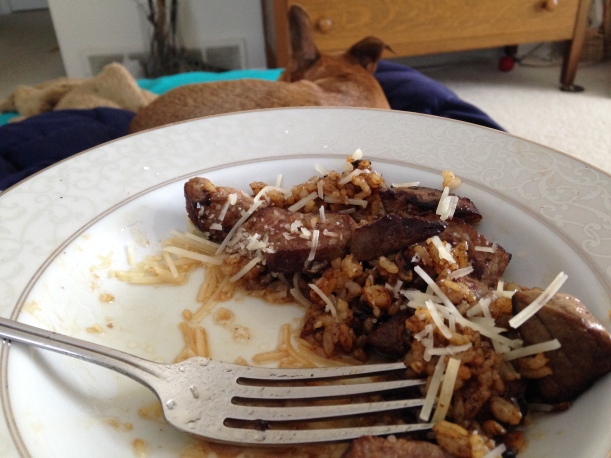
The finished dish, partially consumed, because I couldn't wait until after I'd taken photos to start eating it.

The finished dish, partially consumed, because I couldn’t wait until after I’d taken photos to start eating it.

My dog, sulking because he didn't get any of it. lol

My dog, sulking because he didn’t get any of it. lol


5 Comments

Today’s Adventure: Home-made ground beef (for me and the pooch)

My dog’s digestion has been a bit sensitive lately, and I’ve had him on rice as I try to get it calmed down. The vet did tests and just thinks his tum is out of whack and needs soothing, so I’ve been staying the course and trying to restrict his diet. Today, I thought — it’s been forever since he’s had much other than dry rice, and I’m worried he’s not getting protein — so I researched adding boiled beef to his diet. The consensus was, generally, that it’s best if you grind your own, you’re sure what cuts he (and you!) are getting, how fresh it is, how sanitary its preparation, etc.

So I went and picked up a lb of round, brought it home, and got out the meat grinder. Woohoo!! I almost always try to research before I do something like this, so I read this article: http://www.seriouseats.com/2010/06/how-to-buy-use-clean-and-maintain-a-meat-grinder-attachment-recommendations.html

In it, the author talks about the different kinds of grinders and how to use them, benefits and drawbacks of each, and even gives some cleanup tips (very useful). He also stresses the fact that the temperature of the meat and the grinder both have an effect on the quality of grind you get, and recommends putting the actual grindey bits in the freezer for at least an hour before cutting. I would never in a million years have thought of this. Ever. Oh, Internet, I love you.

It also recommends feeding through a wadded-up paper towel or two after you’ve finished all the meat; it won’t come out the grindey bits, but it will feed through the rotor, pushing out all the meat and helping do a preliminary clean on the inside of the grinder apparatus. Genius!

There was also this article, that compared meat after it was ground by different methods and using different cooking techniques:
http://aht.seriouseats.com/archives/2011/04/the-burger-lab-whats-the-best-way-to-grind-beef.html

In it, the author again stressed the need to chill the grinder. I dutifully plonked the Kitchen Aid’s grinding apparatus into the freezer for an hour, and even though much of it’s plastic, it got pretty cold. I think that did help with the grinding, as I didn’t have any smear or other unpleasantness.

I cut the beef into small (about 1-inch) cubes and fed it into the grinder at a pretty good speed (the article recommends between 6 and 8), pressing down with the wooden pusher thing, until it was all done. Then I wadded up a paper towel and fed it through, being careful to listen and make sure the motor wasn’t straining. It did push out more ground beef, and when I stopped the machine and took out the towel, it brought a lot of the waste out with it, so the cleanup was a snap! (snapping)

Then I boiled the beef for the dog and shaped the remainder into patties for me.
The boiled beef followed this method:
http://www.livestrong.com/article/470764-how-to-boil-ground-beef/
–although it recommends to cook the beef until it browns thoroughly, and I would use the word “gray” instead… lol. In any case, I made sure it was thoroughly cooked through, then dumped it into a colander, then rinsed it. Let it cool, then put it in Snaps’ dish on a bit of rice, and happy dogness ensued. Hooray!! We’ll see how this, em, goes through and then I’ll know if it was a good idea. :}

The patties for myself (I got three small ones out of the remainder) were inspired by this method, again by the same guy. (He sounded like he knew what he was talking about) I did the loose pack, but waited to salt and pepper until later. Fried all three at once, contrary to his instructions, and ended up with perfectly cooked, very crispy patties. It was luscious.

Topped two with a sauce made using olive oil, garlic, parmesan, red pepper flakes, and let that warm and melt a bit into the surface as I prepared the third patty: this one was traditional, just ketchup and chopped dill pickles. Yum.

The burgers were amazingly flavorful, and grinding meat is surprisingly fun. In short, I give this experiment two thumbs up and will likely repeat it before too long. 😀 From cutting open the package of beef to finishing cleanup after the meal was a little over an hour, in total. Well worth it!


Leave a comment

Slow Cooker Balsamic Beef

(this is how I think of it, so it’s how I’m going to title it)

I made this a bunch last winter, but apparently I never posted it here; because when I went to make it this evening, alas! I couldn’t find it. So I had to go back and find the original recipe online, which is (easier than looking for a paper recipe) not as easy as it could be. :}

I finally found it, though, here:
http://www.thekitchn.com/slow-cooker-rec-160583

The Kitchn is one of my favorite cooking websites. If I’m looking for something new to make, and a couple choices come up, and one is from The Kitchn, I’ll try that first.

Of course, as usual, I didn’t have all the ingredients as in this recipe (I don’t think I’ve ever made this exactly as shown), so here’s how I did it today:

Slow Cooker Peppered Beef Shank in Red Wine
serves 4 to 6 as a main course

2 to 2 1/2 pounds beef crosscut shank, fat trimmed away (I had 2 lbs of beef round)
Kosher salt and freshly ground black pepper
Vegetable or peanut oil (I use olive)
10 to 12 cloves garlic, peeled and roughly chopped (I leave them whole)
2 medium yellow onions, peeled and roughly chopped (I had half a large sweet yellow onion)
1 large stalk celery, roughly chopped (nope, I don’t keep celery in the house. Just don’t like it)
1 bay leaf (I used 2 because that’s how I roll)
1 rosemary sprig (about 2 teaspoons of dried rosemary, crushed)
750 ml bottle inexpensive red wine, such as Charles Shaw Cabernet Sauvignon (I used a lot of cooking sherry)
4 cups beef broth (I used about 5c water)
2 tablespoons balsamic vinegar (I often use black cherry, but today I went with plain)

First, in a large deep skillet, brown the meat. Get a really nice dark brown crust on it. (It says to season the meat before cooking, but I usually don’t, as I have an OCD thing about handling raw meat and oh my god my hands get sticky and ASDFGHJKL; — I know. I’m a wuss. It works just fine if you add the spices later.) My skillet is neither deep nor large enough to do all this meat at once, so I cut it into smaller chunks and do in two batches. I season as it’s cooking, and I add some salt/pepper to the pot.

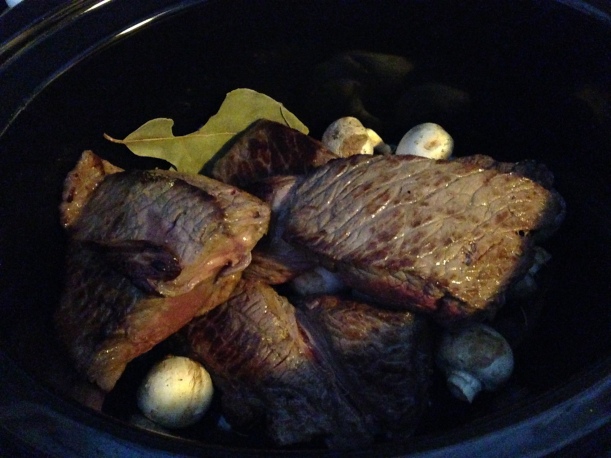
Meanwhile, I was chopping the onion and preparing the garlic cloves — I don’t chop them, I add them whole, because I love getting a sweet stewed garlic clove. It’s like a little gift — and adding whole mushrooms to the pot (I don’t like celery, but I loooove mushrooms), as well as the bay leaves and rosemary. (You’re supposed to add those to the skillet in a minute, but my skillet was already overflowing with onions etc)

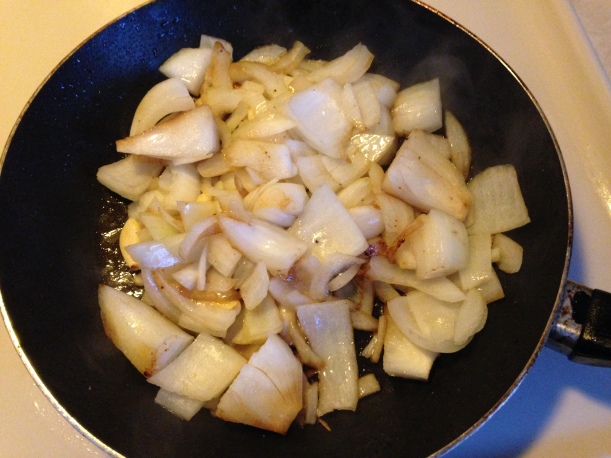
Once the beef’s seared nice and brown, I plop it over into the Crockpot, and add the onions and garlic to the pan. Let those soften for a good long while — I usually get them semi-transparent — and then add the wine (sherry). The recipe says a whole bottle, but skillet overflow is a tragedy when it involves alcohol, so I just added enough to deglaze the pan and simmer the vegetables. Maybe an inch. Then the balsamic vinegar, letting it simmer for about 10 minutes. This is a great time to wash dishes and tidy up!

After that was done, I poured it over the beef in the Crockpot, then added more sherry — about another third of the bottle — and water to cover, which was about 5 cups in my pot. Then covered it with the lid, and turned it on high for 4 hours. Hopefully that will be enough to get the meat somewhat tender… I hope. lol I’m impatient. I don’t want to wait until tomorrow lunch. 😀

I’ll get back to you on whether this was a long enough cook time.

UPDATE: It wasn’t quite long enough to tenderize the meat, but it’s fully cooked and not too tough. I just pulled out my five big beef chunks and cut/shredded them into bite-size chunks, then added them back to the pot. And the flavor is deLISH. So, good enough!


IMG_3156

IMG_3157


Leave a comment

Quasi-sliders on homemade brioche buns

So for once I actually have GF hamburger buns (or something that will work as buns) in the house, and a good GF burger is a rarity here… I dropped by the store and grabbed some ground beef on manager’s special (booyah!!), then came home and prepared a wee feast. 😀

For the burgers, I mixed up about half the ground beef (I’m only using half and freezing the rest, because “cooking for one”. I won’t eat all of it before it goes bad, most likely). A nifty trick I picked up recently for getting extra air out of freezer bags containing raw meat: immerse the mostly closed bag, up to near the zipper, in a bowl of cold water before closing; the water pressure will push out much of the air for you, and this means you don’t have to do the “sucking the extra air out of the bag” trick on raw meat, because EW.

I put in chopped sweet white onion, garlic powder, salt, pepper, crumbs from 1/4 of a brioche roll that had got stale overnight, and Worcestershire sauce. Mmmmmmm.

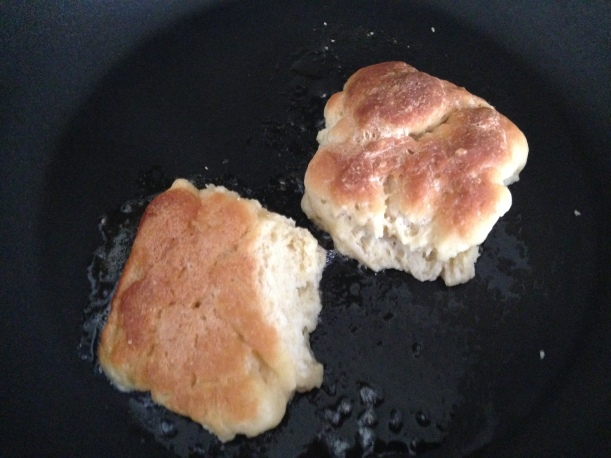
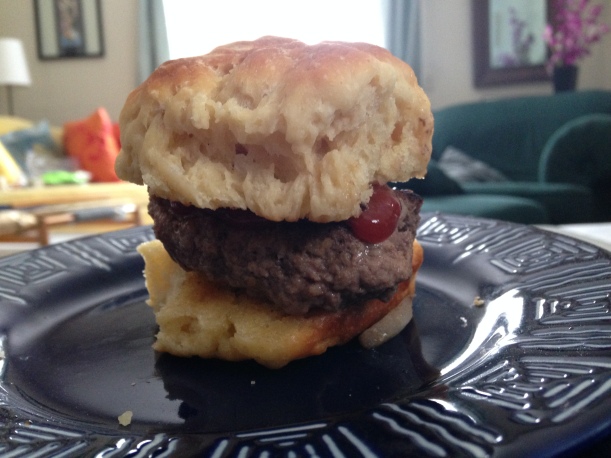
Then cut one of the brioche rolls in half, buttered it, and fried it until brown in the pan. Fried up the patties (the rolls are small, so I got almost four palm-sized patties out of this). and put on the roll with a little ketchup. The onions browned up and got sweet and juicy, and — although I haven’t had a slider since before 2004 — that’s one of the features I remember being most characteristic… those sweet bursting onions (although theirs are fancier).

Delicious. For next time, I won’t be as cautious with the spices and W sauce. This effort was a little bland for perfection, but it’s going in the right direction. Got a favorite burger mixture you use? I’d love to hear it. 😀

Buns frying joyfully in the pan...

Buns frying joyfully in the pan…

The finished burger!! Hooray!!

The finished burger!! Hooray!!